Create Stunning Virtual Tours
in 3 Simple Steps
No technical skills required. No complex software to master. Just three straightforward steps from your 360 degree images to a published tour
Step 1
Upload Your 360 Degree Images
Start with Your 360 Photography
What happens behind the scenes
Our system automatically optimizes your images for web delivery without sacrificing quality. Large files are compressed intelligently, metadata is preserved, and multiple resolution versions are generated for different screen sizes. Your original images remain untouched.
Supported Formats
- 360 degree equirectangular images (2:1 aspect ratio)
- Standard JPEG and PNG files
- Resolution from 4K to 16K
- File sizes up to 50MB per image
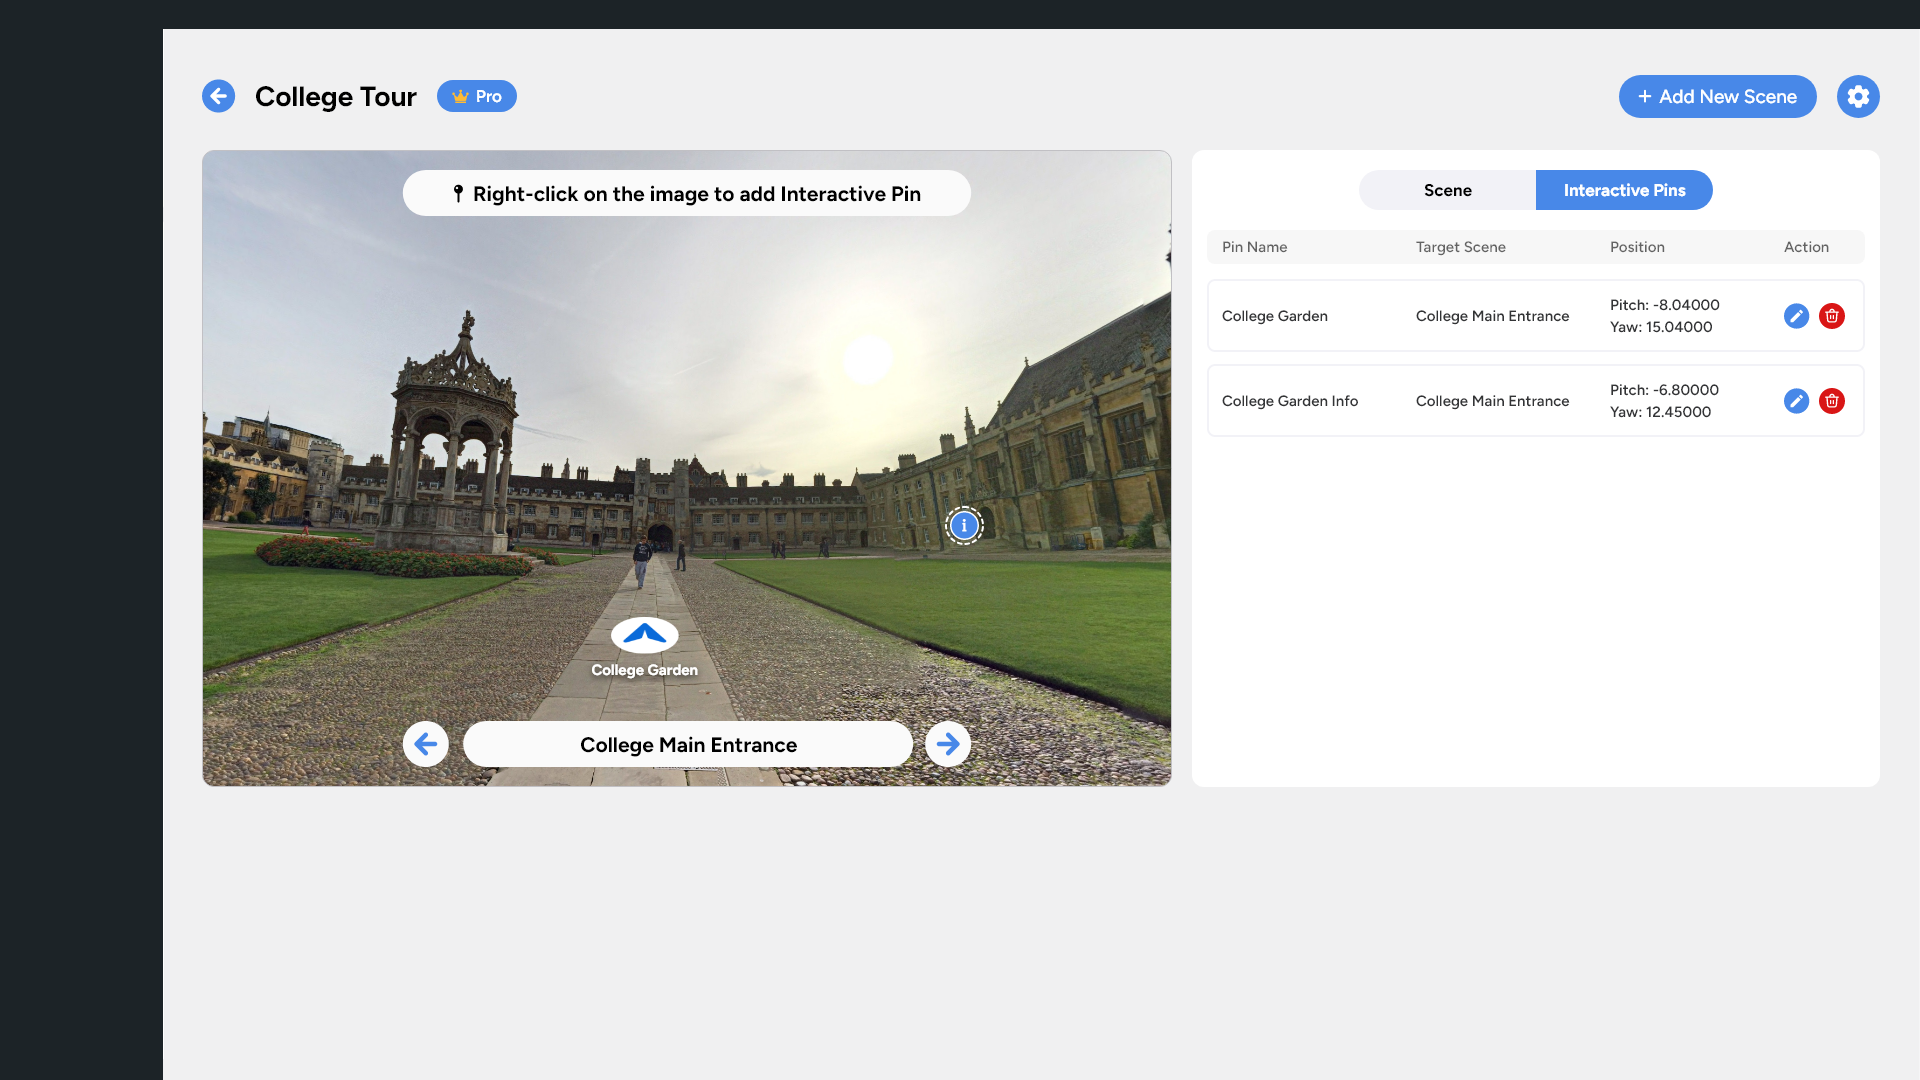
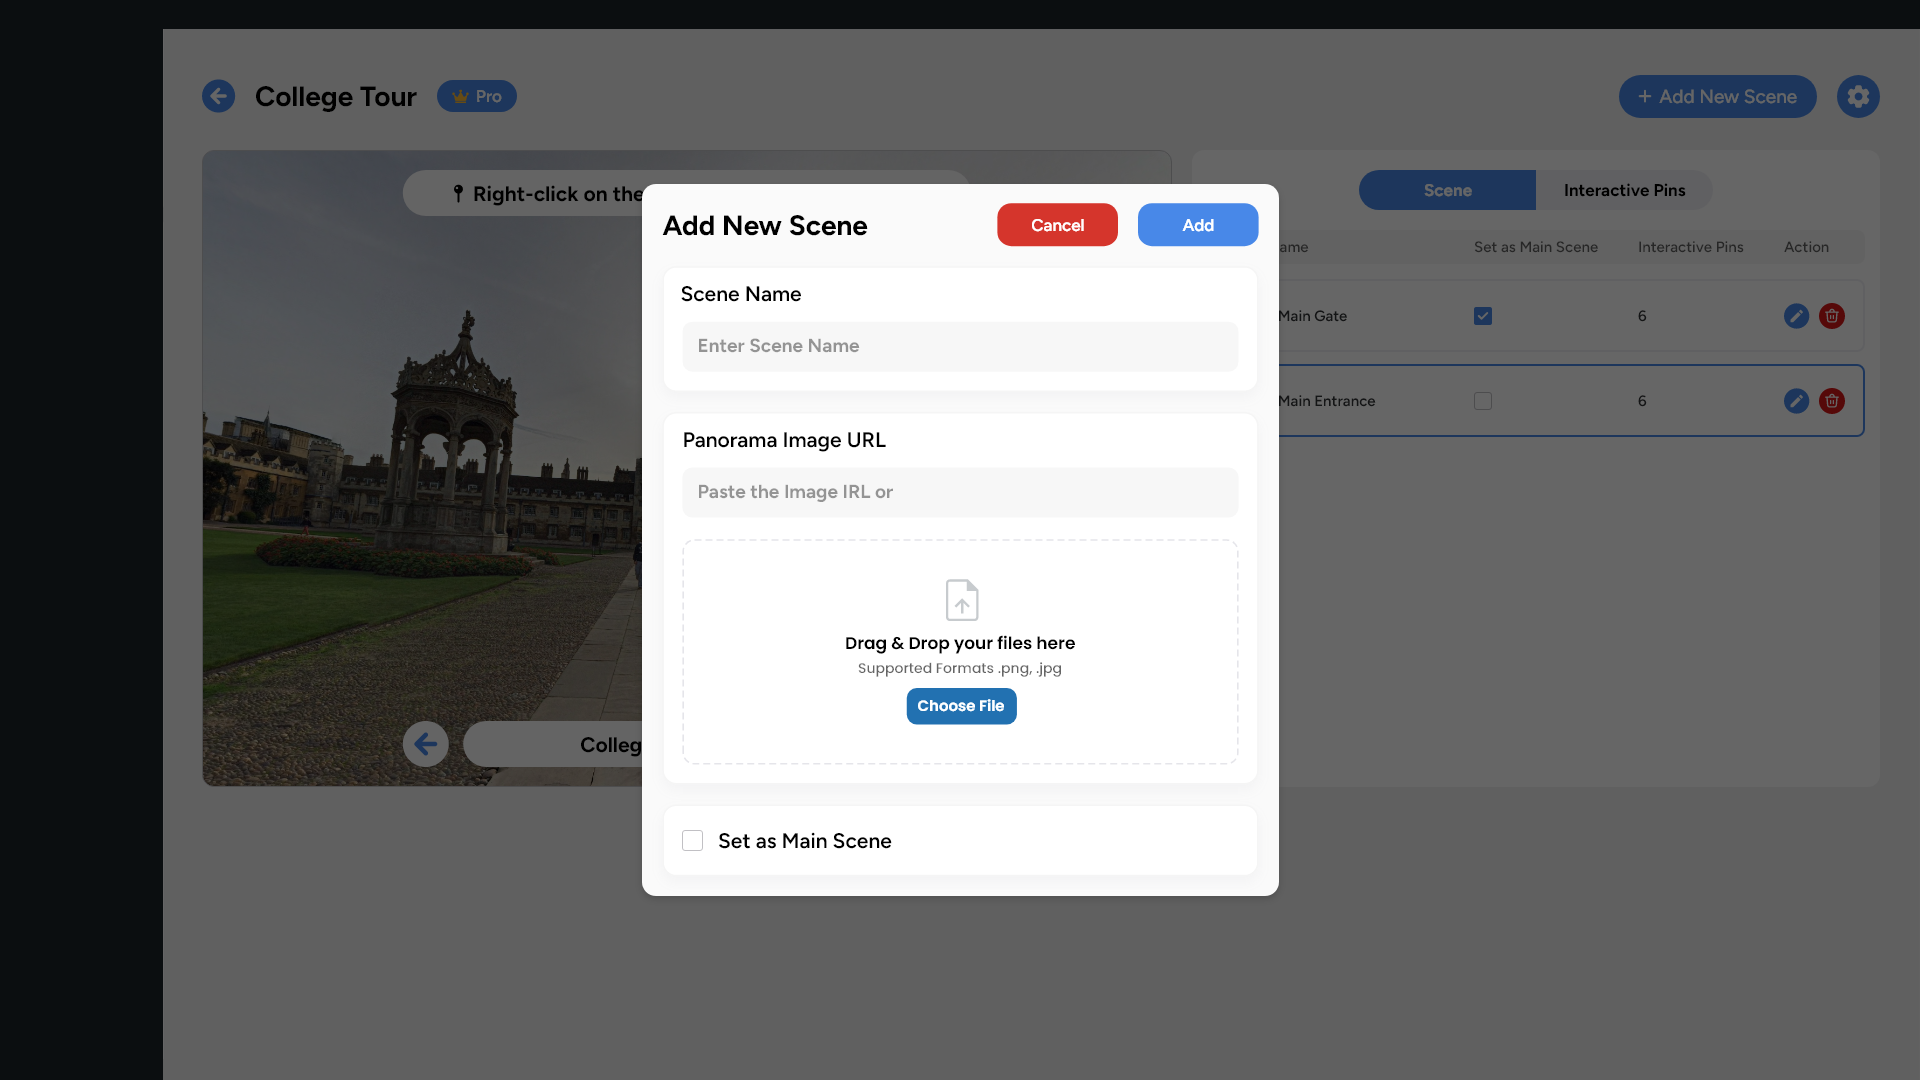
Step 2
Add Scenes & Link with Interactive Hotspots
Organize and Connect Your Virtual Space
Once your images are uploaded, drag them into your tour canvas to create scenes. Each scene represents one 360 degree viewpoint in your space. Now bring your tour to life by adding two types of hotspots
Navigation Hotspots: Create connections between scenes so viewers can walk through your space naturally. Click on an image, place a navigation hotspot where you want viewers to transition, then select which scene it should link to. The system automatically handles the smooth transition animation.
Information Hotspots: Add rich content throughout your tour. Click to place an info hotspot, then add text descriptions, titles, or even embed images. These hotspots appear as pulsing icons that viewers can click to reveal your content.
Customization Options
- Choose hotspot colors to match your branding
- Adjust hotspot sizes for visibility and aesthetics
- Preview hotspot placement from different angles
- Reposition hotspots by dragging them to new locations
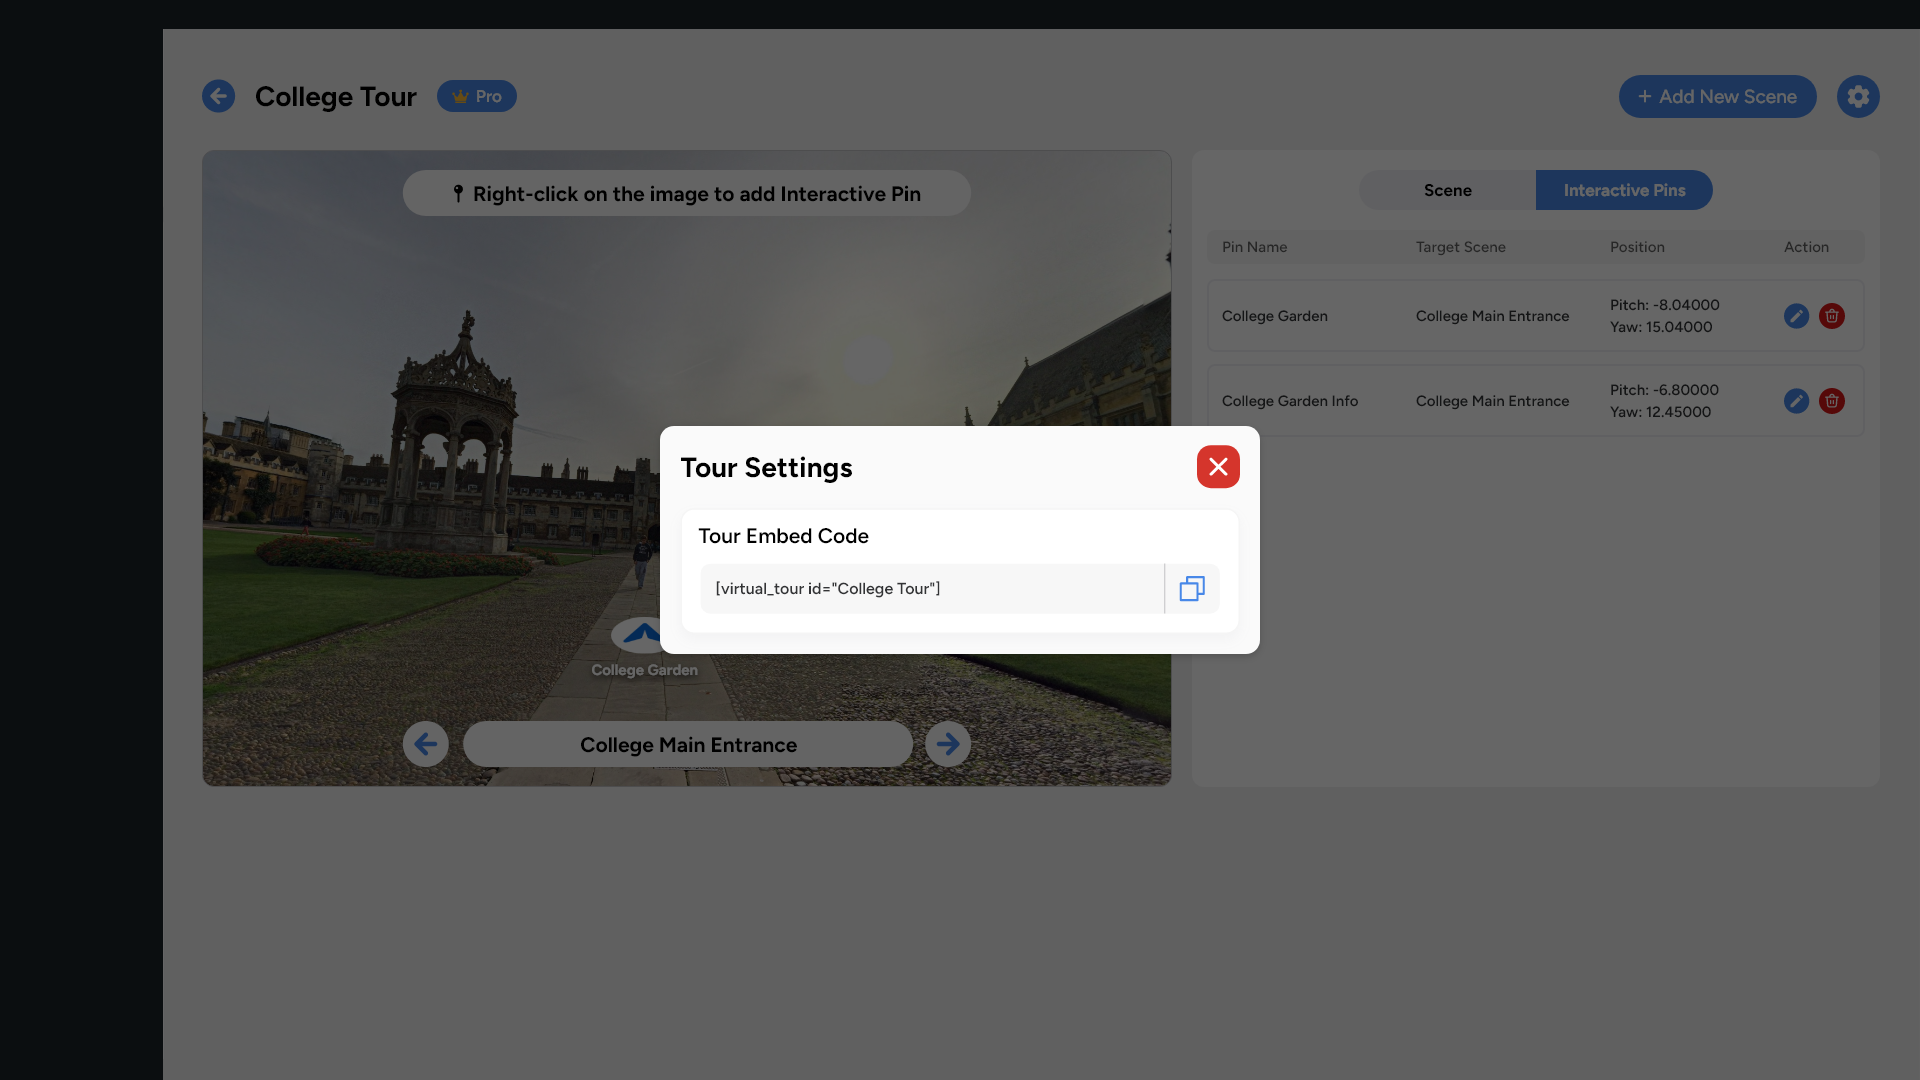
Step 3
Publish Everywhere
Deploy to WordPress and VR Platforms
When your tour is ready, publishing takes seconds. Click the publish button to generate:
- WordPress Shortcode: Copy the shortcode and paste it into any page, post, or widget area on your WordPress site. The tour embeds cleanly with no iframe complexity or plugin conflicts.
- Direct Link: A Get a standalone URL that works anywhere: email campaigns, social media, QR codes, or embedded in non WordPress websites. When accessed on Apple Vision Pro or Meta Quest browsers, tours automatically activate Spatial Mode for an immersive experience.
Instant Publishing
No rendering queues, no processing delays, no waiting. Your tour goes live the moment you click publish and can be updated anytime with changes reflected immediately.
Deployment Features
- Instant WordPress embedding via Shortcode
- Direct links for email and social media sharing
- Automatic Spatial Mode for VR headset users
- Real-time updates without re-embedding
Experience Virtual Tour 360
in Action
Watch the walkthrough or try the live demo yourself. Explore a sample virtual tour created with our platform. This is exactly what you will be able to create in minutes
Speed
Most users publish their first complete tour within 30 minutes of starting, including the time to upload images and learn the interface
Simplicity
If you can use a modern smartphone or web app, you can use Virtual Tour 360. No special training or technical background required
Flexibility
Make changes anytime without republishing or breaking existing embeds. Add new scenes, update hotspots, or refresh images while your tour stays live
Pro Results
Even first time users create tours that look and perform like those from expensive specialized agencies
Ready to Start Building?
Join thousands of professionals creating immersive web experiences.